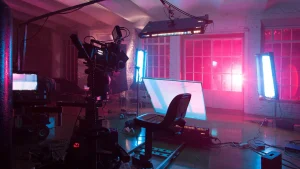
Lighting in videos or films is not just a matter of “as long as it’s bright,” but is a visual language that influences the mood, narrative, and audience’s perception of the characters. It is not just a technical tool, but an important part of visual storytelling that brings scenes to life. So, if you are just starting to learn film production, it is essential to first understand the basic concepts of lighting.
Why is lighting important?
Lighting can create a certain mood, guide the audience’s attention, and express emotions without using words. For example, dim light with sharp shadows can create a tense or mysterious atmosphere, while soft and natural lighting creates a warm and calm impression. Lighting also helps to clarify what you are photographing, show what time it is (day or night, or if it is sunset) and make the image more interesting.
Three-Point Lighting
One of the most basic techniques often learned at the beginning is Three-Point Lighting. As the name suggests, this technique uses three light sources:


1. Key Light: this is the main and brightest light, usually placed on one side of the subject to create dimension and shadows. The key light is the most dominant light source in a scene.
2. Fill Light: serves to reduce the harsh shadows produced by the key light. It is usually positioned on the opposite side of the key light and is less intense.
3. Back Light/Rim Light: placed behind the subject, the back light creates a line of light around the edges of the subject’s body or hair to make them stand out from the background. This is important for image depth.
By adjusting these three lights, you can make the subject appear “alive” and not flat.
Types of Light Sources
On set, you can use various types of light sources, ranging from natural to artificial:
1. Natural Light

Light from the sun, either direct sunlight or indirect daylight (cloudy daylight). Often used for outdoor shooting, but still requires the help of a reflector or diffuser for control.
2. Tungsten


This lamp has a warm color (around 3200K) and is often used in indoor settings. Its disadvantages are that it is hot and consumes a lot of power, but it remains a favorite among many cinematographers because of its distinctive tone.
3. Fluorescent


More energy efficient and cooler, but sometimes the color can be tricky if not controlled properly. Requires an additional filter to ensure consistent color.
4. LED


A popular modern choice. Flexible, lightweight, color-adjustable (bicolor or RGB), and more energy efficient. Suitable for indie productions to large-scale projects.
Soft Light vs Hard Light


- Soft Light: Diffused light that creates soft, smooth shadows. Typically used on faces to make them look more flattering (for example, when shooting beauty shots or emotional dramas).
- Hard Light: Direct, focused light that produces sharp shadows. Suitable for dramatic effects, such as in film noir or thrillers.
How to make light softer? Use a diffuser such as a softbox, white cloth, or bounce the light off a white surface.
Cara bikin cahaya jadi lebih soft? Gunakan diffuser seperti softbox, white cloth, atau pantulkan cahaya ke permukaan putih (bouncing).
Color Temperature

Each light source has a different color temperature, measured in Kelvin (K):
- 3200K = Warm/Orange (Tungsten)
- 5600K = Daylight/Neutral (Sunlight)
- Above 6000K = Cool/Blue (Cloudy sky)
Cinematographers need to ensure that all lights in a scene have a consistent color temperature, unless they want to play with colors for aesthetic reasons (e.g., blue lighting for a sad mood, yellow lighting for nostalgia).
Lighting Techniques Based on Style
1. High Key

Bright lighting with low contrast. Often used in comedies, commercials, or light dramas. Minimal shadows, all details are clearly visible.
2. Low Key

Dark lighting with high contrast. Lots of shadows and light focused only on certain areas. Suitable for horror, mystery, or noir films.
3. Motivated

Use “reasonable” light sources in the scene, such as table lamps, candles, or light from outside the window. The goal is to make the lighting feel natural and realistic.
4. Practical

Similar to motivated lighting, but the light source is actually inside the frame and also illuminates the subject. Examples: neon lights in the background of a nightclub, or Christmas lights.
Lighting and Characters
Would you believe that lighting can affect our perception of characters?
- Light from below can make a face look scary.
- Light from the side makes a face look mysterious.
- Soft light from the front (beauty light) makes characters look warm and sympathetic.
That’s why lighting must be designed according to the tone of the story and the nature of the characters.
Lighting Tips for Beginners
- Understand the mood of the scene before setting up the lights.
- Use inexpensive reflectors (styrofoam works!) for light reflection.
- Don’t be afraid to play with shadows. Shadows can tell a lot of the story.
- Use a diffuser if the light is too harsh.
- Try recording a lighting test before rolling the camera.
Read also Depth of Field: Focus Play in Cinema.
Lighting isn’t just about light or dark, but about how you can create emotion, narrative, and character through light. Even with limited tools, as long as you understand the basic principles, you can create powerful and meaningful visuals.
So, next time you watch a movie, pay attention: is the light coming in through the window intentionally set? Do the shadows on the character’s face affect the story? The answer is almost always yes. Because in film, every light has meaning.