The Rule of Thirds is like a basic ingredient in the visual kitchen. It may seem simple, but its effects can make your images or videos feel much neater, aesthetic, and pleasing to the eye.
“Good pictures are all about taste.” We hear that phrase a lot, especially from people who have been in the visual world for a long time. And yes, taste is important-but the good news is that it can also be trained. For those who are just starting to pick up a camera, this technique is a “life hack” so that you don’t get confused about the subject. In the world of photography and movies, it’s understanding the Rule of Thirds.
If you are just starting out with a camera, this technique can be a lifesaver when you are confused about where to place your subject. If you’re more experienced, the Rule of Thirds can be the foundation that keeps your images consistently neat, before you start experimenting with more unique and “outlandish” framing styles.
What is Rule of Thirds?
Imagine your camera screen divided into nine equal squares-like a tic-tac-toe board game. There are two horizontal lines and two vertical lines that divide the frame. The points where the lines meet are called power points.
These are where we usually place our subjects or important elements. Why not just in the center? Because the human eye has a tendency to look a little towards the periphery first, rather than the exact center. So, when the subject is placed on the power points, the audience’s attention will be drawn naturally, without having to be forced.
Why is this technique effective?
Imagine if all your photos or movie scenes had the subject exactly in the center. It would feel flat and monotonous. Rule of Thirds makes your composition feel more alive, has a sense of direction, and gives the frame “breath”. It gives the viewer room to explore the visuals, not just stay in one spot.
In a way, Rule of Thirds teaches us that every element in an image has an important position and role. It’s not just “fit in the frame.”
Examples of Application in Movies:
1. Character Close-Up
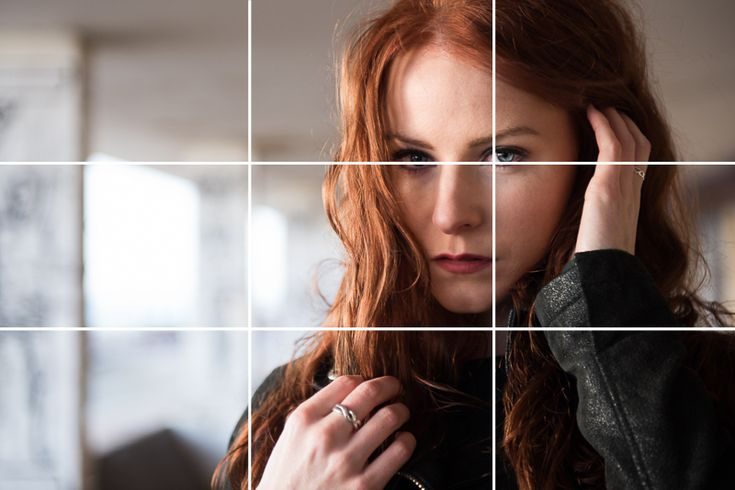
Instead of putting the character’s face in the center, slide it slightly to the left or right following one of the vertical lines. Place the character’s eyes parallel to the top horizontal line. The effect? More cinematic, more focused, but still feels natural.
2. Landscape Shot
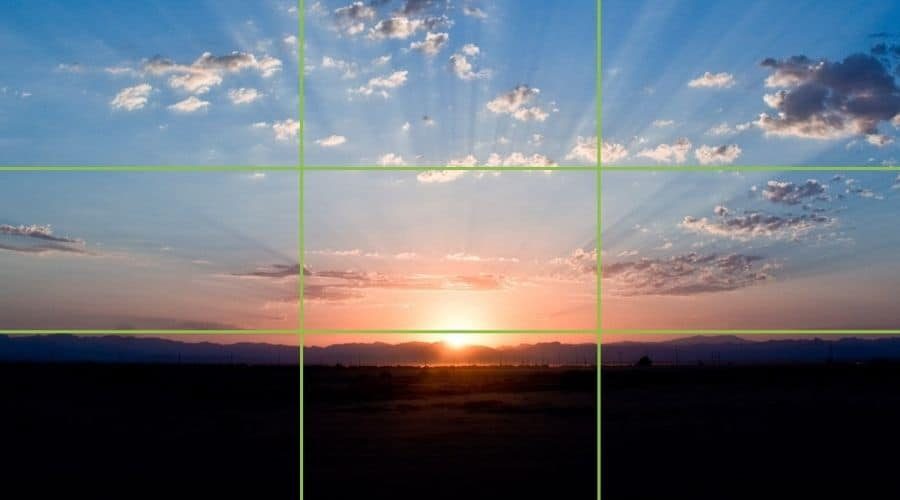
If you are photographing or taking a video of a scene, first decide on the focus: sky or ground? If the sky is dramatic, put the horizon on the bottom horizontal line. If the foreground is more interesting, put the horizon on the top line. Avoid splitting it right down the middle as it can make the image feel “flat.”
3. Two Character Dialogue
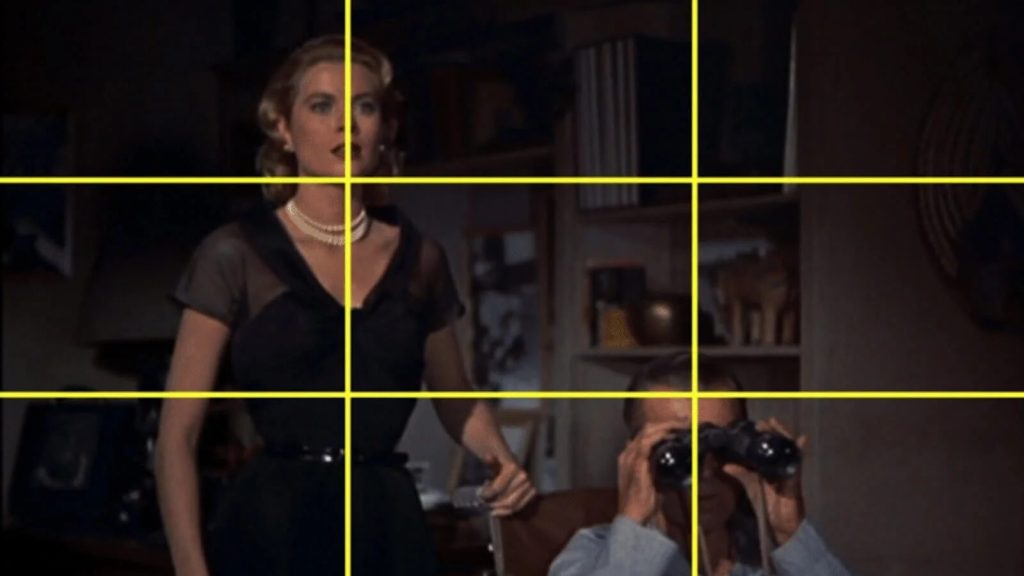
When recording a conversation between two people, place each of them on the side of the frame according to the Rule of Thirds points. Apart from making the composition neat, it also helps the audience understand where the characters are in the space without any additional explanation.
4. Movement in Frame

If the character is walking to the right, place him on the left side of the frame and leave an empty space in front of him. That empty space isn’t just “empty”-it gives visual direction and invites the audience to follow the character’s movement.
All movies use this rule?
But make no mistake, not all movies have to use this. There’s also the center framing technique that directors like Stanley Kubrick or Wes Anderson often use to create symmetry or a quirky vibe. The difference is, they understand the rules first before “naughty” breaking them.
Read also: 13 Types of Framing in Movies.
When to use and when to break?
- Use it when you need a safe composition, want to direct focus without distraction, or want a balanced visual.
- Break it when you want to show symmetry, create a sense of discomfort, or need center focus for the sake of narrative.
Tips for Beginners
- Activate the grid feature on your camera or smartphone.
- Practice static photos before video.
- Pay attention to the eye line parallel to the top horizontal line.
- Utilize negative space for drama.
- When editing, don’t hesitate to crop for composition correction.
In essence, the Rule of Thirds is not just a technical trick, but a way of visual thinking. By getting used to using this rule, you train your eyes to be more sensitive to composition. Eventually, your instincts will form-you won’t have to think too hard when placing your subject.
And once you get used to it, you can start playing with other styles: center framing, extreme symmetry, chaos framing, or even framing that deliberately makes the viewer uncomfortable. As the saying goes (that we just made up): “Great filmmakers know when to follow the rules, when to make their own rules.” Because at the end of the day, the camera is just a tool. It’s your story, your style, and your visual sense that makes a picture really speak.


